How to Upload From Kaltura to University
Use this article to add media to a page, word, assignment, etc. within Canvass.
In this article:
- Using the Canvas Rich Content Editor to Add Media from Kaltura
- Uploading Media
- Embedding Media Already Uploaded to Your Kaltura My Media Library
- Embedding an Existing Media Gallery Playlist
- Recording Your Webcam
- Adding a Video from YouTube
- Notes on Embedding Sound-Merely Recordings
- Boosted Resources
Kaltura is the University of Minnesota's media management organisation that integrates with Canvass. Within Canvass, you can:
- upload media (video and audio recordings) to Kaltura from your computer or mobile device
- manage media already in your Kaltura account; refer to more information near My Media
- use your estimator's webcam to record new media
- publish your recordings within a course, so only people in the course tin can view it.
To include all Kaltura videos within a Canvas course in one specific searchable area, refer to Add Kaltura Videos to Media Galleries.
Using the Canvas Rich Content Editor to Add Media from Kaltura
-
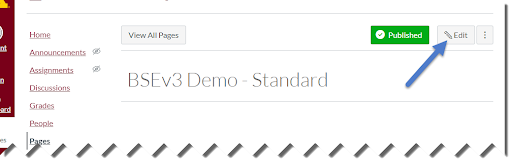
Go to the Canvas Page, Assignment, or another surface area where yous would like to add together Kaltura media into your Canvas course and click Edit. Canvas' Rich Content Editor (RCE) opens.
- Click Embed Media from Kaltura to open the embed window.

- Next steps depend on your needs.

Select an option from the choices below to bound to the appropriate section:- Upload media files from your computer or mobile device
- Embed media already uploaded to your Kaltura My Media library
- Embed an existing playlist from the form Media Gallery
- Record using your webcam
- Add a video from YouTube
Uploading Media
- Select Upload Media to open the Upload Media page.
- Drag and Drib a file or select Choose a file to upload and detect the media you wish to upload from your computer or mobile device.

- Click Embed at the top of the folio, then select Save beneath the RCE.
If you wish to change the proper noun or other settings well-nigh the uploaded file, see information about My Media.
Embedding Media Already Uploaded to Your Kaltura My Media Library
SelectMore Media Optionsto open yourMy Media library.
- To utilise the default embed settings: Select Embedto the right of the desired media.TheRCE opens with your content. SelectSalve beneath the RCE.
- To customize your embed settings: Select the EmbedSouthward ettings icon to the right of the desired media to open the settings:
- Select a Choose Player choice:
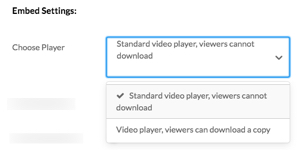
- Standard actor; viewers cannot download is the default player.
- Video player; viewers tin download a copy if you want users to be able to download the video.
- Note: This option is non available for YouTube videos in Kaltura.
- Video player, includes transcript based on airtight captions if y'all want viewers to be able to run into a transcript interface along with the video that includes text search capabilities.
- Select the preferredMax Embed Size.
- Optional: Turn on the Thumbnail Embedded option.
- This feature displays a thumbnail of the media instead of the total role player interface. When a viewer clicks the thumbnail, the player interface appears.
- Optional: ChangeOffset & End Time settings.
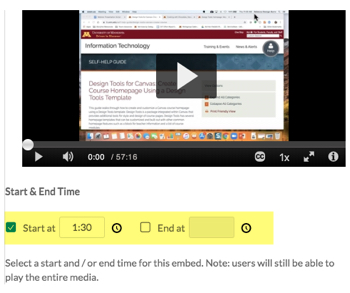
- Check the box next to Start at or Cease at and enter specific start/terminate times.
- Note: Viewers continue to have access to the full video even later custom start and terminate options are ready.
- Check the box next to Start at or Cease at and enter specific start/terminate times.
- Uncheck the checkbox next to Set as my default settings for media blazon: Video.

- Notation: Leaving the box checked sets all current settings (except the offset and stop time selections) as the new default settings for that type of media when yous embed usingMore Media Options.
- Select Embed at the top right of the options window.The embedded media appears in the RCE.
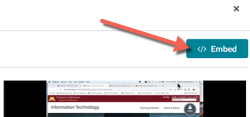
- Select Save beneath the RCE.
If yous choose to also post this media in the course Media Gallery, viewers volition see a name based on the file name you uploaded. If you wish to alter the name, description, etc., refer to information and steps most My Media.
Embedding an Existing Media Gallery Playlist
If needed, follow the steps to create a Media Gallery playlist. Once you have a playlist created:
- Return to the RCE. (If necessary, click the Embed Kaltura Media button.)
- Select More Media Options,then theMedia Gallery Playlists tab.
- To use the default embed settings, select Embed to the right of the desired playlist.
- To customize the playlist embed settings, selectEmbed Settings (the gear icon) to the left of the Embed push. The Embed Settings window opens.
- Select one of the post-obitChoose Player options:
- Playlist player; viewers cannot download is the default thespian.
- Playlist actor; viewers can download a re-create if you desire users to be able to download the video.
- Playlist player, includes transcript based on closed captions if yous want viewers to be able to search inside the video.
- UncheckSet as my default settings for media type: Aqueduct playlists.
- Note: Leaving the box checked sets all current settings every bit the new defaults for the next time you embed a Media Gallery playlist using the Rich Content Editor.
- Select Embed at the top right of the Embed Settings window. The embedded playlist appears in the RCE.
- Select one of the post-obitChoose Player options:
- Select Salvage below the RCE.
Recording Your Webcam
- In the Embed Media from Kaltura window, select Record Webcam.
- Annotation: This tool is intended for making recordings that are shorter than ten minutes. For more than information, refer to Use Your Computer'southward Webcam to Record a New Video with Kaltura.
- For other recording options, refer to Compare Video Recording Tools.
- Follow the directions on the page.
- Afterward you finish your recording, select Use This. Your recording will upload to Kaltura's systems. When complete, you will see an Upload Completed! message
- Select Embed. Your recording (or a temporary placeholder) will appear in the RCE window.
- Select Save below the RCE.
If y'all choose to also post this media in the course Media Gallery, viewers will come across a name based on the appointment and time it was recorded, eastward.g. Video Recording - Tue Jan xix 2021 eleven:23:12 GMT-0600 (CST). If you lot wish to change the name, description, etc, refer to information and steps for My Media.
Calculation a Video from YouTube
- In the Embed Media from Kaltura window, select Add from YouTube.
- For more data, refer to Linking to Content in YouTube.
- Paste a link to a YouTube video.
- Select Preview. The video will appear in the window.
- Select Embed. The YouTube video you are linking to will appear in the RCE window.
- Select Save below the RCE.
If you choose to also post this media in the course Media Gallery, viewers will come across the proper noun and description that were pulled from YouTube when you completed the steps in a higher place. If you wish to change the name and clarification, refer to data and steps for My Media.
Notes on Embedding Sound-only Recordings
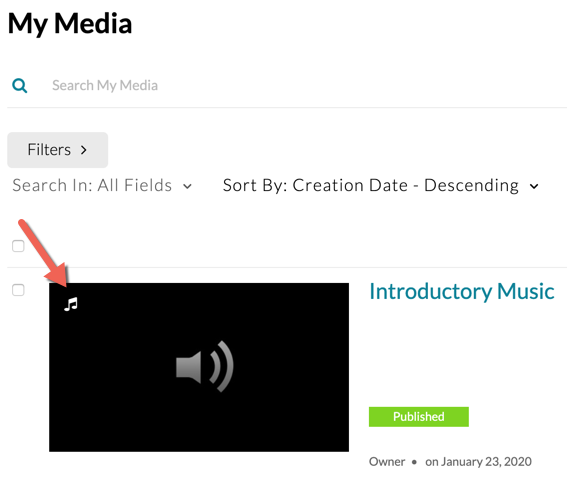
When embedding audio recordings using Kaltura, a smaller thespian provides a singled-out look for audio-but media, and is denoted past a musical note in the corner of the video.
Boosted Resources
- To include all Kaltura videos inside a Canvass course in 1 specific searchable area, refer to Add Kaltura Videos to Media Galleries.
- To group related videos together in a playlist, get to the Using Playlists to Control the Guild of Media Added to a Media Gallery section within Manage and Moderate Kaltura Media Galleries. This method is an especially useful style to interruption longer recordings (such as lectures) into multiple pieces, then group them together.
- For other good practices, refer to Streamline your procedure for creating and sharing grade videos
Source: https://it.umn.edu/services-technologies/how-tos/canvas-add-media-using-kaltura-rich
0 Response to "How to Upload From Kaltura to University"
Post a Comment